 P4A Documentation
Submitting a policy
Share your custom PDK policy by submitting a public GitHub, GitLab, or Bitbucket repository for validation and review.
Overview
A policy submission is how you share your custom PDK policy with the P4A community. You provide the URL of a public GitHub, GitLab, or Bitbucket repository that contains your policy project, and P4A validates the structure, builds it, and lists it in the catalog after review. Start a submission from the Policies page via the Submit Policy button, or jump straight to My Contributions to see your existing submissions.
What we accept
P4A accepts the two project layouts MuleSoft documents for the Policy Development Kit, plus the same layouts when nested inside a Cargo workspace:
Unified-model policy projects — a single Rust crate at the repository root or in a subdirectory. Request-path and response-path logic share one lib.rs, and Cargo.toml declares the pdk dependency. The project root must also include a .project.yaml file — the PDK project descriptor that marks the repository root as a policy project. This is the layout MuleSoft recommends as the default; see Creating a Unified-Model Policy Project.
Example: P4A-Policies-for-Agents/utcp-policy.
Split-model policy projects — the policy definition and policy implementation live in distinct crates so they can be released and updated independently. P4A recognizes both halves and validates each. Use this layout when you have a reason to ship them separately; see Creating a Split-Model Policy Project.
Example: slack-request-verification-policy — the policy definition crate is slack-request-verification-definition/ and the policy implementation crate is slack-request-verification-flex/.
Nested Cargo workspaces — both layouts above are also accepted when the policy crate(s) live inside a larger Cargo workspace. P4A resolves the workspace structure, locates the policy crate, and follows workspace dependency inheritance (for example, pdk = { workspace = true }).
Example (split-model nested): ai-semantic-cache — the workspace contains the definition/ and implementation/ crates of one policy variant alongside other variants.
For background on the PDK and where these layouts come from, see the Omni Gateway PDK overview.
PDK version requirement
Your policy must depend on PDK version 1.8.0 or newer. P4A checks the pdk dependency in your Cargo.toml during validation.
If your policy crate inherits the PDK dependency from a workspace (pdk = { workspace = true }), P4A looks in the workspace's [workspace.dependencies] section to verify the version.
For the latest PDK release and its changes, see the Omni Gateway PDK release notes — bumping to a recent version is usually a one-line change in Cargo.toml.
What we validate before accepting your submission
Before we accept your submission, we check that:
- The repository is publicly accessible
- The policy directory contains the expected Cargo project structure
- The PDK dependency is present and resolves correctly
- The PDK version is 1.8.0 or higher
If any of these checks fail, you'll see a detailed error message in the submission form, and you can correct your repository and resubmit.
Submitting a policy walks you through a short wizard — one step at a time, so you're never faced with one long form:
- Basics — the policy name.
- Repository — the project type, the public GitHub, GitLab, or Bitbucket URL(s), and an optional default branch. Click Validate here; the next step stays locked until validation passes.
- Classification — asset types your policy targets (agent, api, llm, mcp) and enforcement direction. Values are inferred from your repository but you can adjust them.
- Description — a Markdown description of what the policy does.
- Documentation — optional rich, tabbed docs (see Documenting your policy below).
- Links & media — optional links to a video tutorial and example docs, plus the policy icon and any ideas this policy delivers.
- Review — a summary of everything you entered before you submit.
Move between steps with Back and Next; you can also click a completed step in the progress bar to jump back to it. Once Basics, Repository, Classification, and Description are filled you can Skip to review — the optional Documentation and Links & media steps don't block submission. The final Submit for Review button lives on the Review step.
Policy classification
After validation passes, the wizard's Classification step shows how P4A categorized your policy. This helps readers filter the catalog to find policies that match the assets they use.
Three attributes are classified:
- Asset kinds — the types of assets your policy applies to: agent (agentic systems), api (REST/HTTP APIs), llm (language models), or mcp (Model Context Protocol servers). A policy can target more than one kind.
- A2A protocol versions — when your policy targets agents, this lists the A2A protocol versions it supports (v0.3.0, v1.0). This field is only shown when "agent" is selected as an asset kind.
- Direction — whether your policy acts on inbound requests (incoming traffic, most policies) or outbound requests (upstream calls, the response leg). This is always inferred and cannot be manually edited.
P4A infers these values from your repository's definition/gcl.yaml metadata and from keywords in your policy name and description. When your repository declares asset types in its gcl.yaml, those tokens drive the classification — the keyword fallback is used only when there are no tokens at all.
You can adjust the inferred asset kinds and A2A versions if they don't match your policy's intent. Any manual edit you make sticks: it won't be silently overwritten by a future re-inference. Direction is always derived and never overridden.
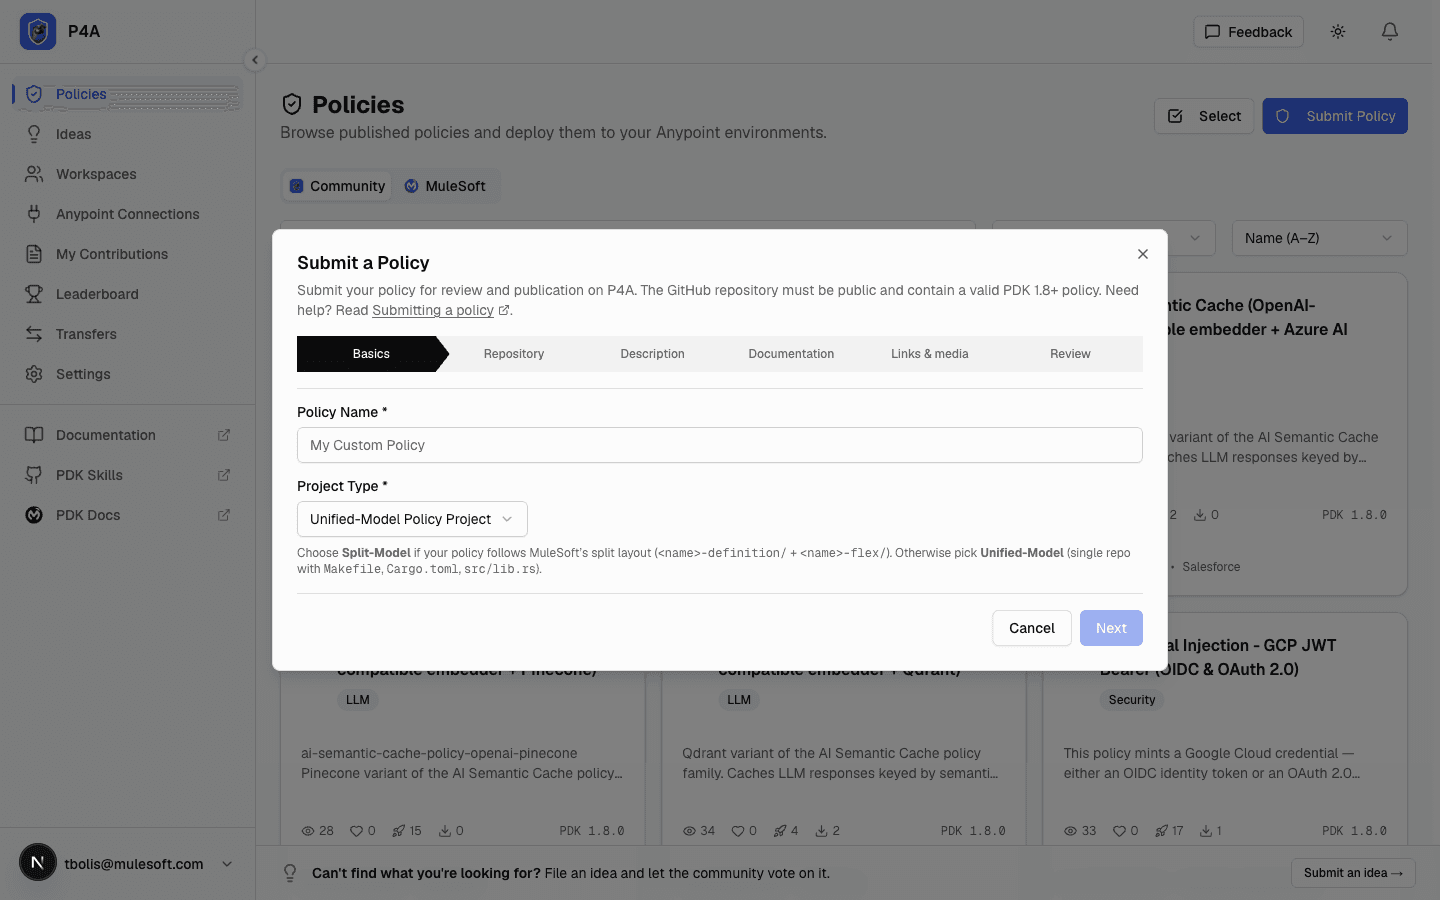
When validation passes, a green banner confirms the resolved PDK version and you can advance past the Repository step.
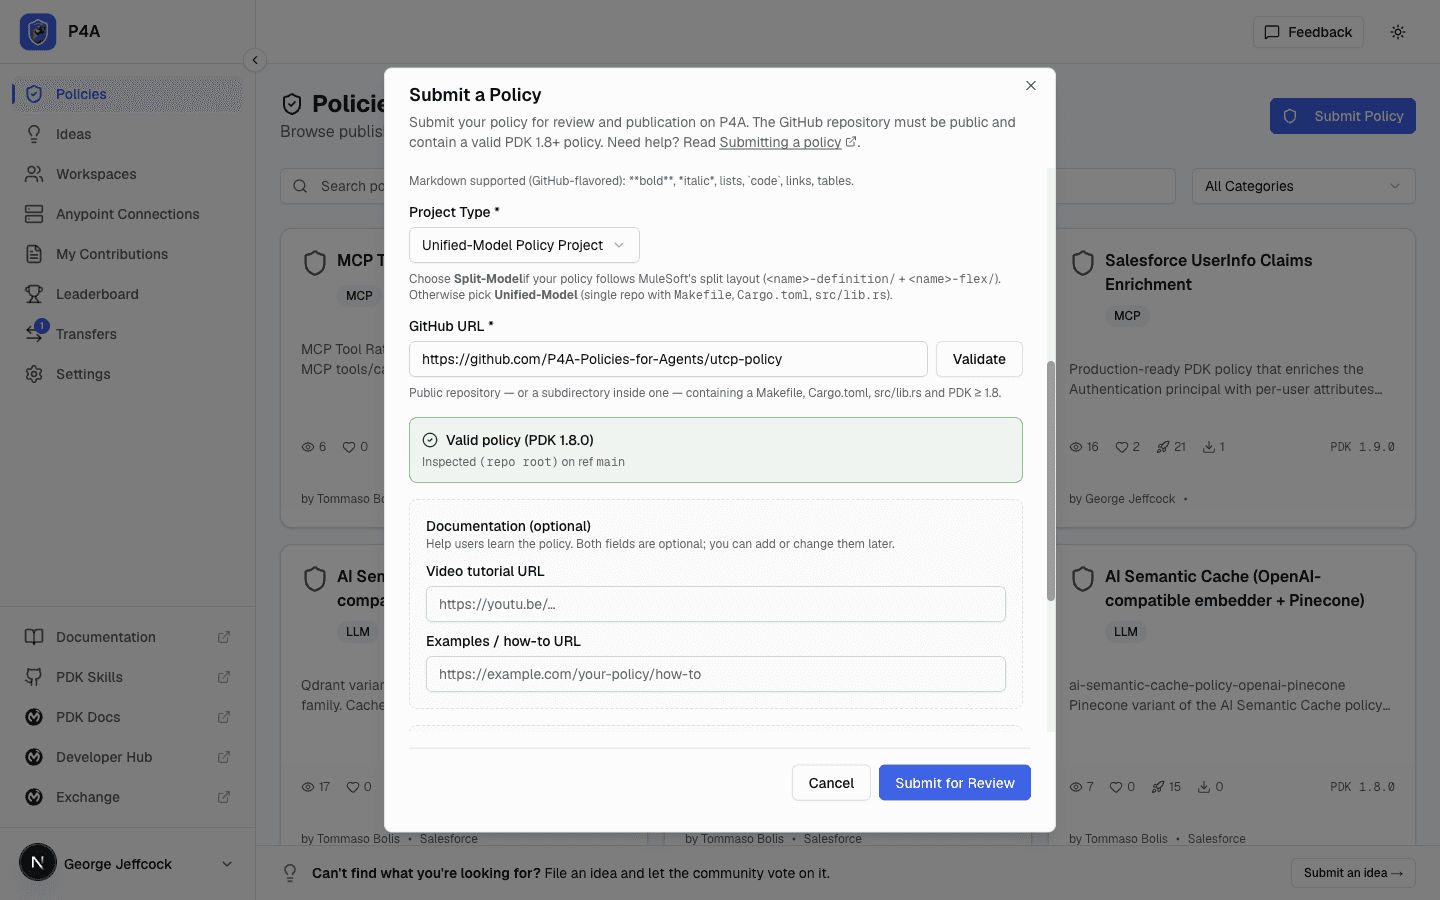
Choosing a default branch (optional)
The Repository step also lets you set a default branch — the git branch, tag, or commit P4A uses as the default source when your policy is deployed. Leave it blank to use the repository's own default branch. After you validate, the field offers a dropdown of the branches found in your repository, but you can also type any branch name, tag, or commit. Split-model policies get a separate default branch for the definition root and the implementation root.
This is only a default: whoever deploys the policy can still pick a different branch in the deploy dialog. The chosen default is shown read-only on the policy's Source repository card, and you can change it later when you resubmit (or an admin can change it from the edit dialog).
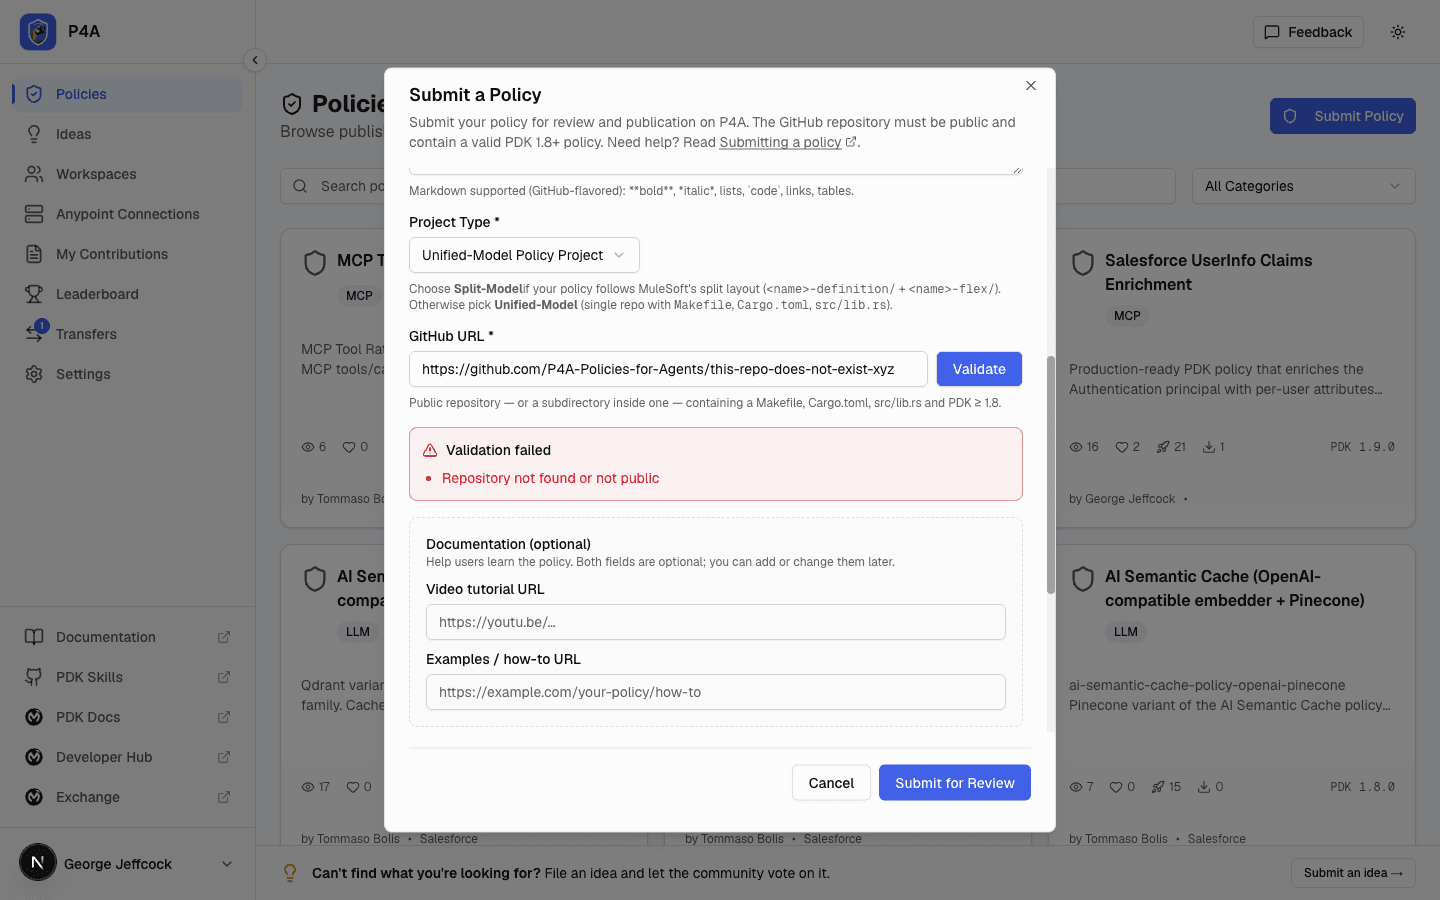
When validation fails, a red banner explains why — repository missing, no Cargo.toml found, PDK dependency missing or below 1.8, etc. Fix the issue in your repository and click Validate again.
Adding a custom icon (optional)
Give your policy a recognizable icon in the catalog by committing an icon.png or icon.svg file to your policy directory — the same directory your submission URL points at (the repository root, or the subdirectory in a /tree/<branch>/<path> URL). For split-model policies, place it next to your policy definition files. If both icon.png and icon.svg are present, icon.png wins.
P4A discovers the icon automatically during validation — there's nothing extra to fill in. When no icon is found, the catalog shows a default shield. Keep the image small and roughly square so it reads well at icon size.
The submission form has a Policy icon section with a live preview of what the catalog will show. You have three options there:
- Use the discovered icon — the default. Leave the controls alone and the icon found in your repository is used.
- Override with your own URL — paste a direct image URL into Icon URL override to use it instead of (or in place of a missing) repository icon.
- Turn it off — check Don't show a custom icon to fall back to the default shield even when your repository ships an icon.
To change or remove the icon later, update the file in your repository — or adjust the override / opt-out — and resubmit; the catalog reflects whatever you chose the next time your submission is validated.
How it works
The icon is resolved once, at validation time, and stored with your submission:
- Discovery. When validation succeeds, P4A looks for
icon.png(thenicon.svg) in your policy directory and remembers the direct image URL it finds. No file means no discovered icon. - Your choice wins. A URL you type into Icon URL override takes precedence over the discovered file; checking Don't show a custom icon overrides both and forces the default shield. With neither set, the discovered file is used.
- Storage. The single resolved URL (or "none") is saved when you submit, so the catalog doesn't depend on your repository being reachable at view time.
In the catalog and on the policy detail page, the icon is rendered with the default shield painted first and your image lazy-loaded on top — so there's no layout shift, and if the image ever fails to load (file deleted, URL broken) the shield stays visible. Because the URL is resolved at validation time, changing the file or the controls only takes effect when you resubmit.
Documenting your policy (optional)
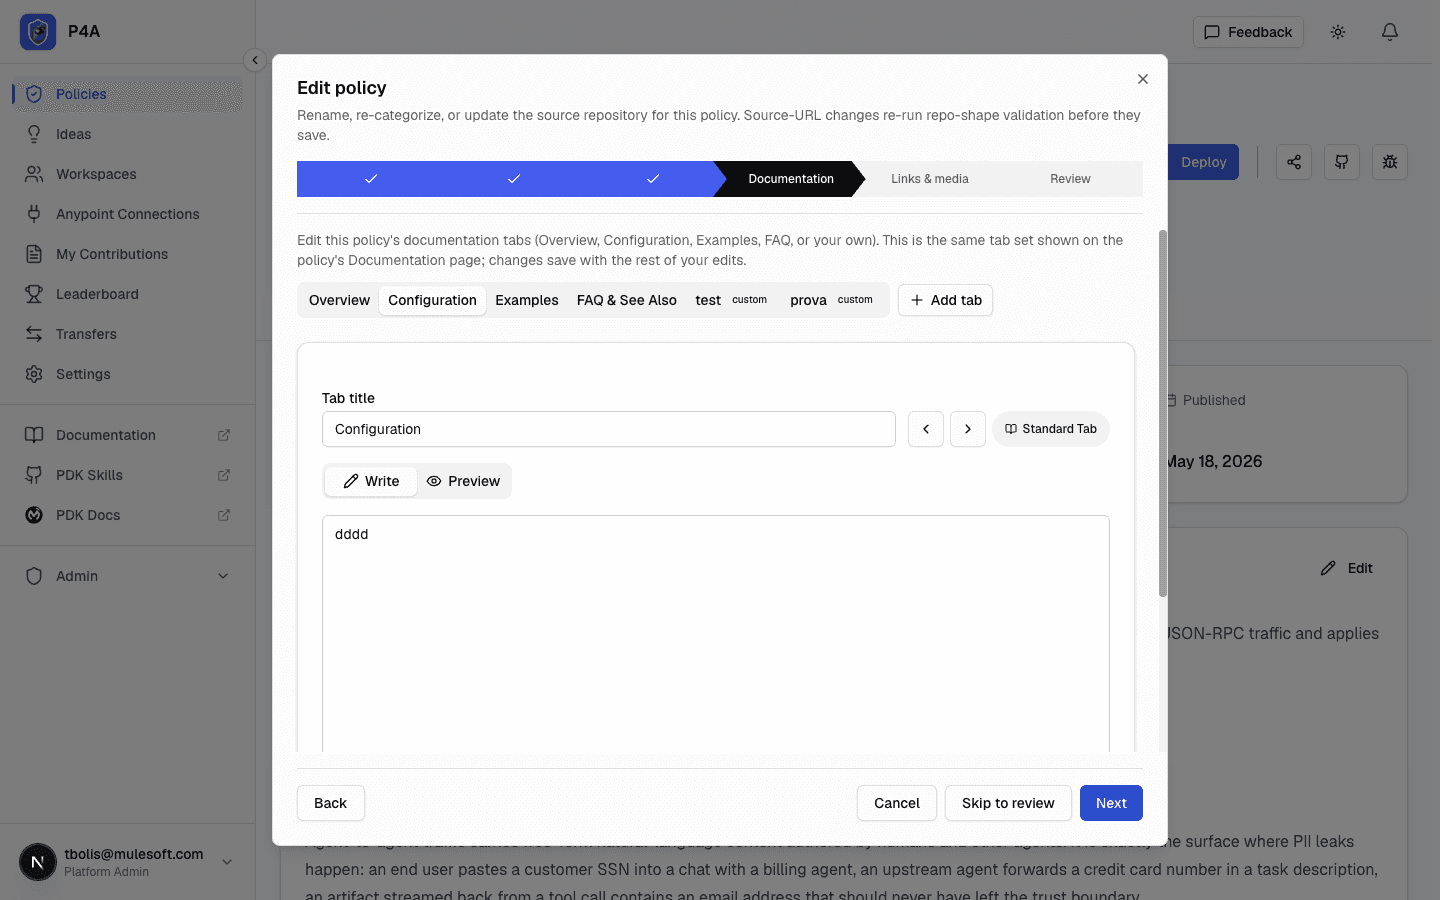
The wizard's Documentation step lets you write rich, tabbed documentation that appears on your policy's page once it's published. This is separate from the video and example links — it's full Markdown content, organised into tabs a reader can switch between.
You start with three ready-made tabs — Configuration, Examples, and FAQ — and can add your own custom tabs with the Add tab control. Fill in the Markdown body of any tab you want to include; leave the rest empty. Empty tabs are simply dropped and never shown to readers.
Your policy's Overview tab is generated from the Description step — you don't write it here, and there's no Overview tab in the Documentation step. Keep the narrative "what this policy does" in the Description; use the Documentation tabs for configuration reference, worked examples, and answers to common questions.
The whole step is optional. Skip it entirely and your published policy still shows the Overview built from your description.
Declaring delivered ideas (optional)
When submitting, you may declare that your policy delivers one or more approved Policy Ideas by choosing full or partial coverage per idea (with an optional scope note). This is a declared intent — it tells reviewers which community requests you're addressing. An admin confirms it during review, and the idea(s) flip to delivered once your policy is approved. See Submitting an idea for the full lifecycle detail.
What happens after you submit
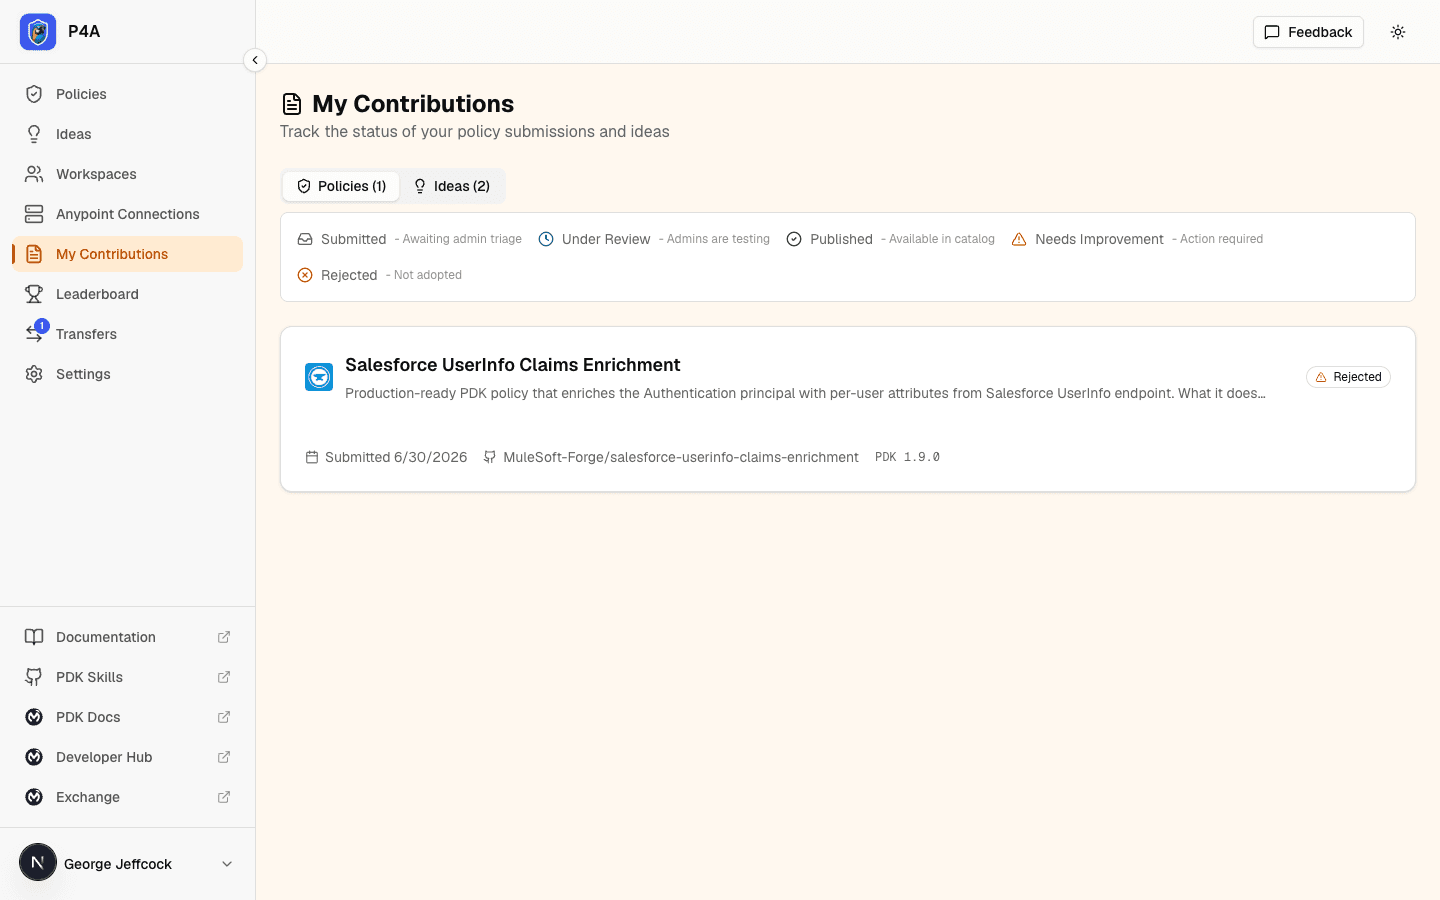
Once your submission passes validation, it moves into the review lifecycle. The policy appears on your My Contributions page with a lifecycle state that tracks its progress through review, approval, and publication to the catalog.
Your My Contributions list updates on its own — when a reviewer moves a submission forward or sends it back, the card's state changes within a second or two while you're looking at the page, with no need to reload.
Lifecycle states
Every submission moves through one of five states. Each state changes what actions are available to you and what other users can see.
            ┌────► needs_improvement ──── (review found something fixable)
submitted ──┤              │
            │              └─────────► under_review ────┬───► published
            └────────────────────────────────────────────┘
                                                         └───► rejected
Every submission starts at submitted. From there an admin can either send it back as needs_improvement (with feedback — typical for quick triage findings like a missing description or PDK below 1.8) or move it to under_review for a deeper review. From under_review the submission lands at published (visible in the public catalog), at rejected (terminal), or — if the deeper review surfaces something fixable — back at needs_improvement with feedback. When you address needs_improvement feedback and resubmit, the submission transitions directly to under_review — no intermediate submitted step.
submitted
A fresh submission lands here as soon as you click Submit for Review. An admin hasn't triaged it yet, so it's not visible to anyone except you and admins. While in submitted (or under_review or published), you can edit the documentation links (video tutorial URL, examples URL) at any time; full edits to title, description, repository URL, or tags are only possible when the submission reaches needs_improvement. The policy's crate itself is locked to the source repository and commit SHA you provided.
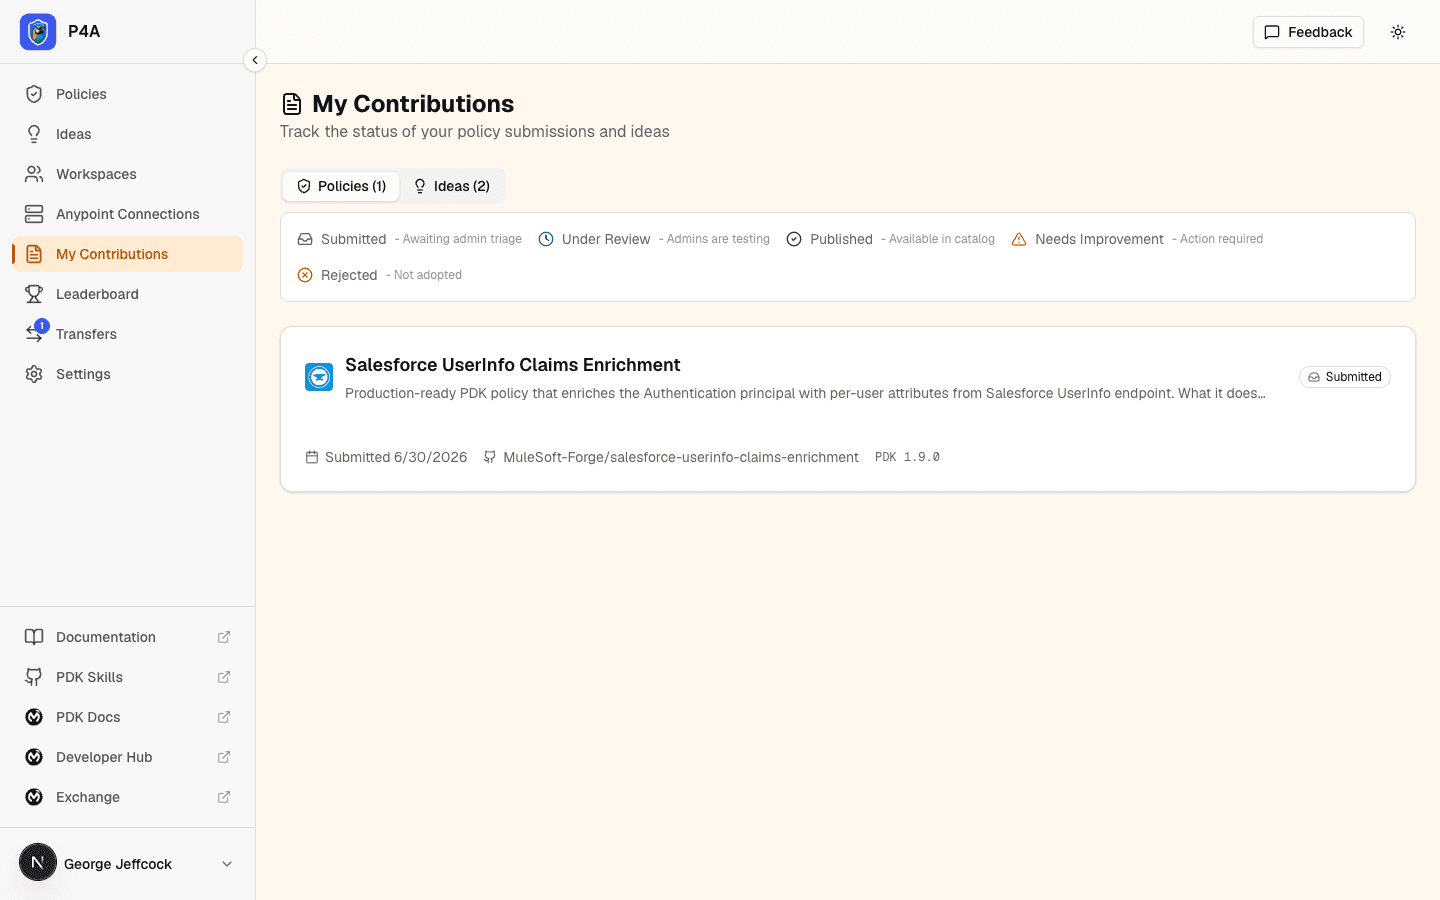
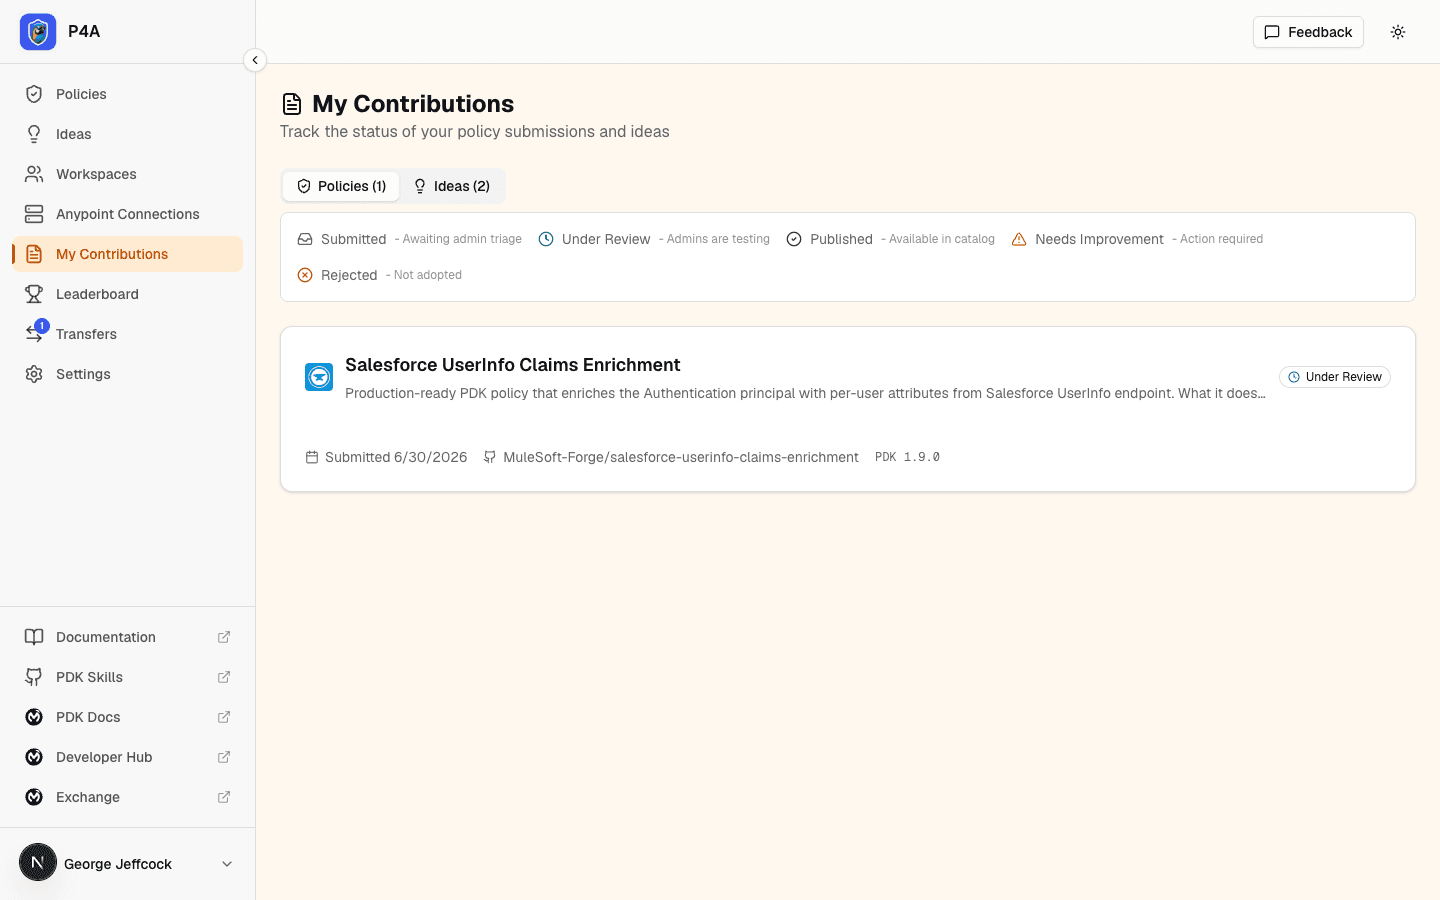
under_review
An admin has picked up your submission and started reviewing it. Reviewers can deploy it to test against an Anypoint organisation, but it's still hidden from the public catalog. You retain full edit access on the metadata.
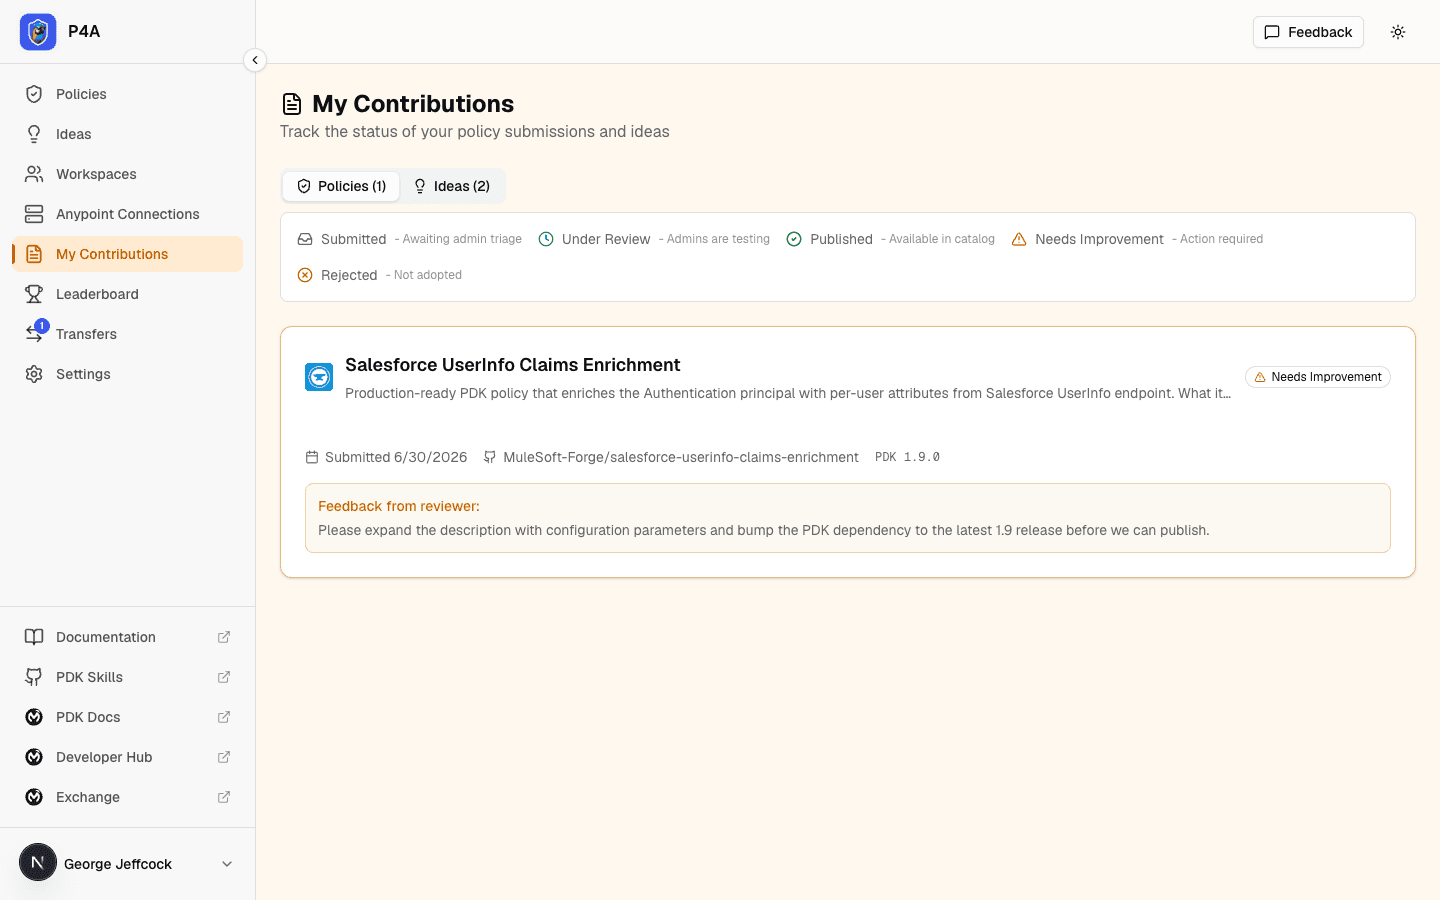
needs_improvement
An admin can send the submission back with feedback at two points in the lifecycle: during initial triage on submitted, or later from under_review once a deeper review has surfaced something fixable. Typical reasons: missing documentation, a build issue, a behavioural concern, or a PDK version that needs bumping. The feedback appears on the submission detail page as a feedback history — every round the submission was sent back, newest-first, each with the reviewer's note and when it was sent — so across multiple resubmissions you can see the full trail of guidance, not just the latest note. Opening a needs_improvement submission takes you straight into the same wizard you used to submit — prefilled with your current name, description, repository, links, and any documentation tabs you staged — so you revise exactly what you need to and submit again. Resubmitting moves the submission directly to under_review for a fresh review, with no intermediate submitted step.
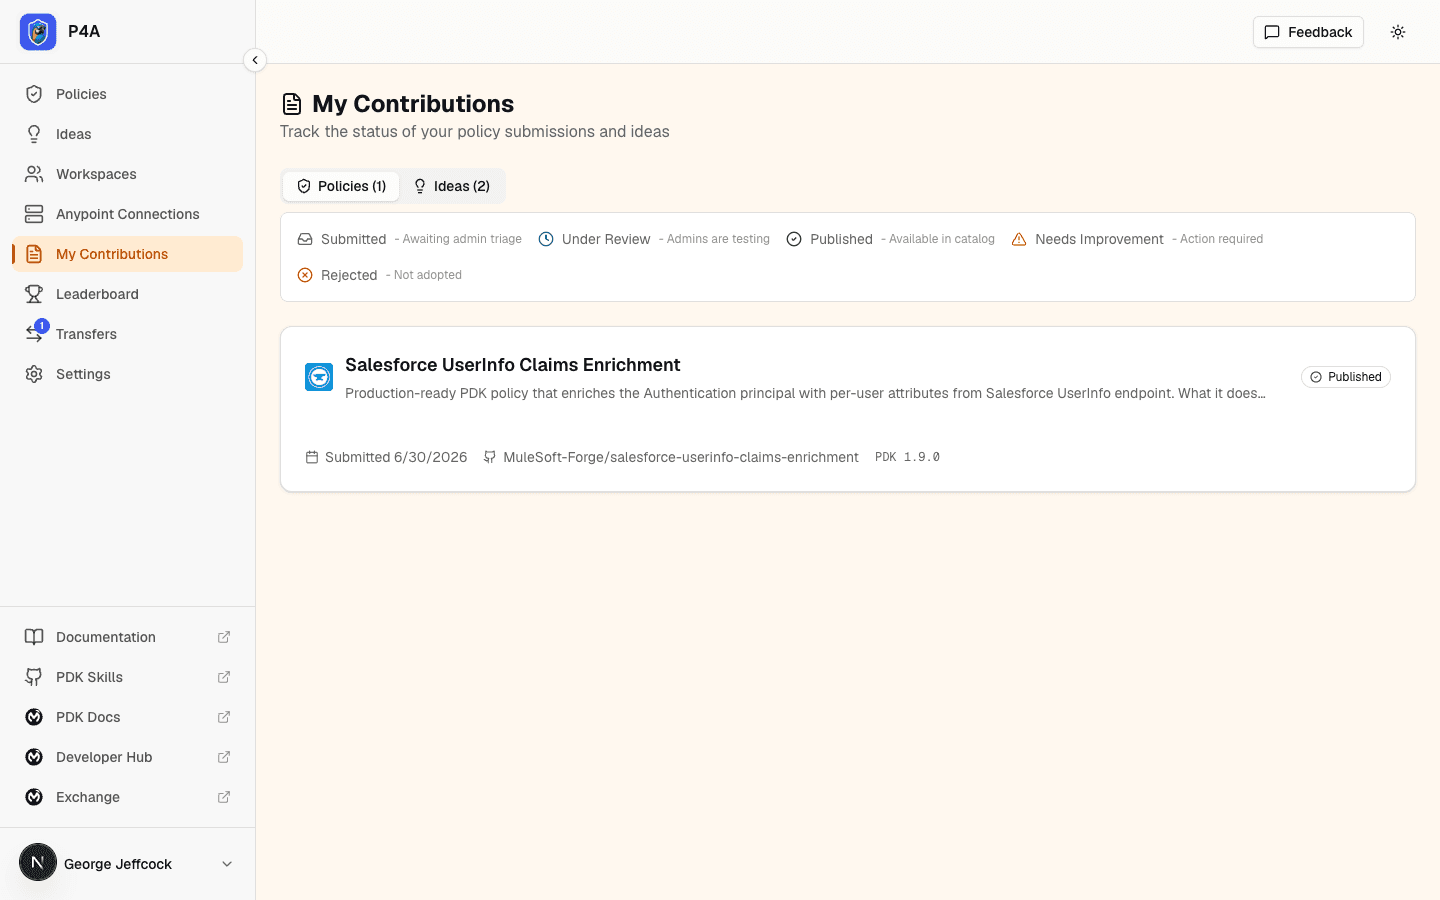
published
The reviewer has approved your submission and it's now visible to everyone in the public catalog. The Deploy button becomes active on the policy detail page; you and any other users with access can deploy it to their connected Anypoint organisations. See Deploying a policy for the deploy flow.
A published submission remains tied to the specific commit you submitted. To update the policy code you create a new submission with a new commit SHA; metadata edits don't require a new submission. Two of those metadata edits — the About text and the source repository — go through a re-review before they replace what visitors see (see Editing a published policy below).
rejected
The reviewer has decided the submission shouldn't be published — most often because the policy doesn't meet requirements, fails validation in a way that can't be quickly fixed, or duplicates an existing policy. The submission detail page shows the reason. You can submit the same repository again with a different commit SHA once you've addressed the feedback; each new submission starts a fresh lifecycle.
Editing a published policy
After your policy is published you remain its owner and can keep it current. Some fields you can change directly; two — the About text and the source repository — are re-reviewed before the change goes live, so a published policy's public-facing description and code source can't be swapped out without a second pair of eyes.
- Edit directly, no review: the documentation links (video tutorial URL, examples / how-to URL). These update immediately.
- Edit with re-review: the About section (the policy's Markdown description) and the source repository URL. On the policy's detail page, open the About this policy or Source repository card and choose Edit, make your change, and choose Submit for review. A Pending review badge appears on that card, and the live catalog keeps showing the current value until a reviewer approves your edit. A source-repository change is re-validated for the same repository shape a new submission is (Makefile,
Cargo.toml,src/lib.rs,.project.yaml, PDK ≥ 1.8) at the moment you submit it, so an invalid repo is caught before the edit is queued.
You can have one pending edit per field at a time — submit a new About edit only once any earlier one has been reviewed. If a reviewer rejects an edit they can leave a short note explaining why; the live value is left untouched and you're free to submit a revised version. If ownership of the policy is transferred to someone else, the edit privilege moves with it — the new owner can propose edits and the previous owner can no longer.
Crediting contributors
Real policies are often built by more than one person. Alongside the Owner, a policy can credit contributors — other registered P4A users who worked on it. Contributors appear in a Contributors tile next to the Owner on the policy's detail page, and each name links to that person's public profile.
Crediting is attribution only: a contributor is shown as a collaborator but gains no ability to edit, deploy, or manage the policy — those stay with the owner. As the owner, open the Contributors tile on your policy's detail page and use the pencil to open Manage contributors. Search by name or @username (the @ is optional) and pick people to add; mark an existing contributor for removal with the ✕ next to their name. Your changes are staged in the dialog — nothing takes effect until you click Save, and Cancel discards them. The tile stays hidden on your policy until at least one contributor is credited.
You can only credit people who already have a P4A account — search matches registered users, and someone who has never signed up won't appear. Ask a collaborator to create an account first if you can't find them.
Crediting also rewards your collaborators: once the policy is published, each contributor earns recognition on the community leaderboard and the policy shows up in the Contributed to list on their public profile — the same way authoring a policy or an idea counts toward their standing.
Notifications
You receive email notifications whenever your submission's state changes — when it moves to under_review, needs_improvement, published, or rejected — so you can take action immediately. The portal dashboard also surfaces recent state changes, giving you a quick view of all your submissions and their current status without needing to check each one individually.
History timeline
Each of your submissions carries a History section that records what happened to it and when — a permanent, read-only trail you can open at any time. Expand it from the submission's detail view on My Contributions, and from the detail page of any policy you submitted once it's published. It stays collapsed until you open it, then loads the events on demand.
The timeline lists each recorded change as a short sentence — when you submitted or resubmitted, when a reviewer moved it through the lifecycle states above (sent it back with feedback, approved it, rejected it), and any edits to the published policy's fields such as its source repository or category. Each entry shows who made the change — you, or a reviewer — and the date and time it happened, newest first. When there's a long trail, Show older pulls in earlier events.
When a reviewer edits a long field such as the policy's description, the timeline keeps the entry compact — it reads "Description updated" rather than printing both the old and new text inline. Use Show changes on that entry to expand a highlighted comparison that marks exactly what was removed and what was added, and Hide changes to collapse it again.
You only ever see the history of your own submissions and the policies you submitted; the timeline is scoped to you. A submission with nothing recorded yet simply reads "No recorded changes yet."